$69.00
Sculpting a hare is like creating a little story, a story of that hare. You bring to life its personality, its character, its charm! This class is for anyone who would love to learn to sculpt using either kiln fired clay, or air drying clay.
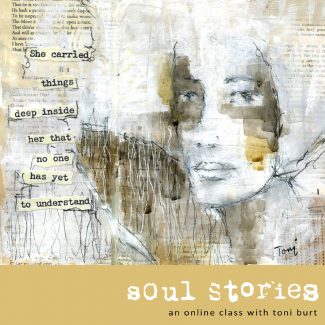
Description
There is something magical, and delightful about the hare. Drawing and painting them, you find the character and charm in them. But sculpting and creating them in clay really brings their cheeky personalities to life. There is a sense of wonder and delight in being able to hold your hare, feel its texture, its form …its soul. This is a class on how to make your hare come to life with sculpture!
The cost for this class is US$69.
When I dreamt of making this class I wanted it to be accessible to everyone. You can use either air drying clay, or clay that is fired in a kiln. As a potter and ceramist of about 14 years now I use kiln fired clay in my daily life, I make all kinds of pottery and sculpture. I’m a big time experimenter, so when the hares began to call to me, I couldn’t resist.
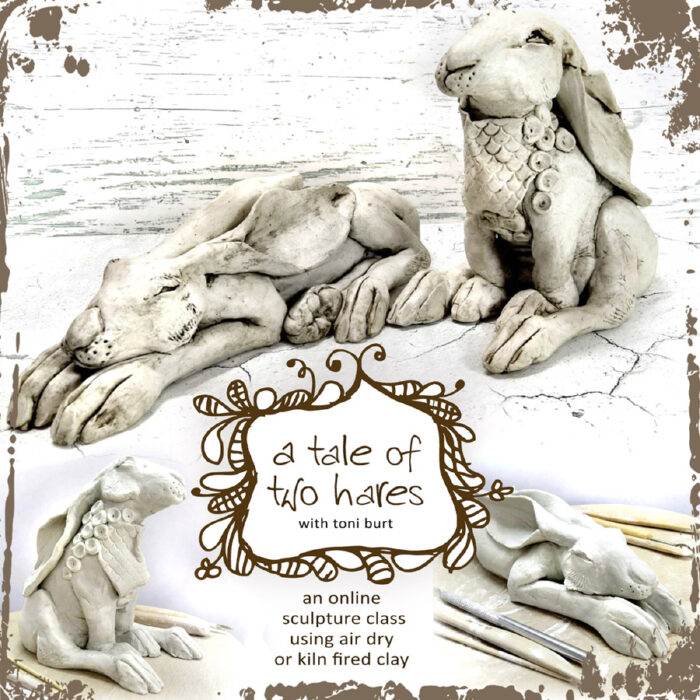
If you have access to a kiln then use your normal clay, if you do not then use air drying clay. I know that a lot of you would like to use air drying clay for the convenience, so this is a multi-clay class 🙂 In the 2 lessons in this class I actually use DAS air drying clay to demonstrate and create my sculptures, but the techniques are designed to work with either type of clay. It’s the same process for any kind of clay. (Note: We do NOT use armatures in this class.)
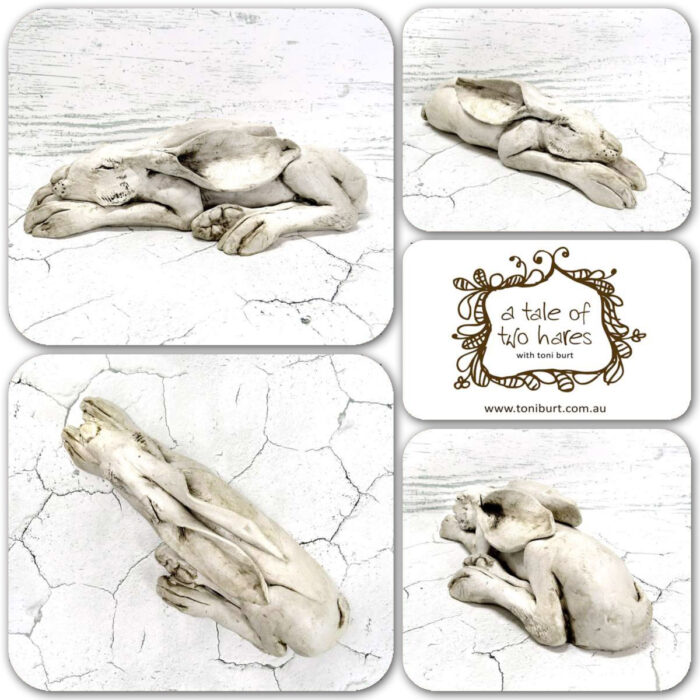
Reclining hare lesson
This class includes lots of information including several videos on supplies and materials, which clay to choose and why, how to prepare your clay, along with everything you need to know. I provide options for alternatives to standard pottery tools that you can use, so chopsticks and spatulas from your kitchen can be substituted for “normal” clay and carving tools.
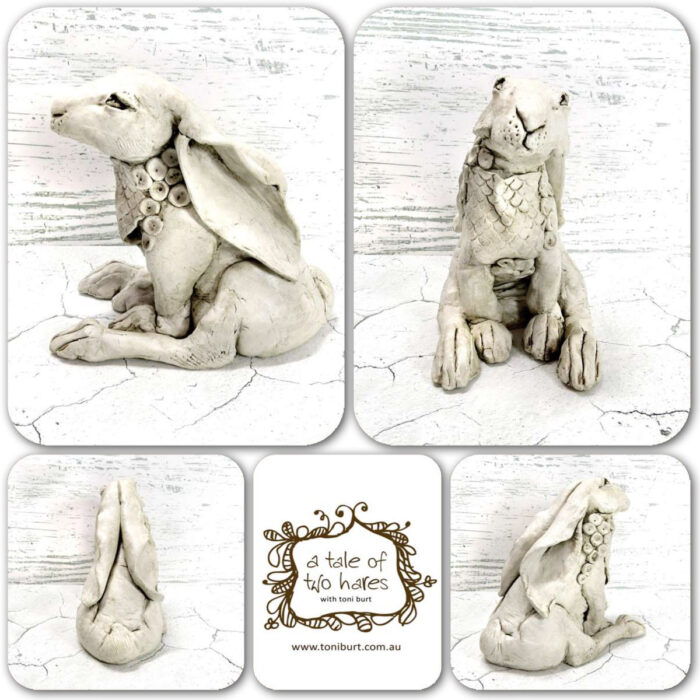
Sitting hare lesson
This class is for beginners and intermediate level. Both lessons are step by step instruction, and take between 2-3 hours each.

After your hares are finished I will discuss options for painting, colouring and sealing them. Once your hare sculpture is complete it is your choice on how you wish to decorate it. If you are using kiln fired clay I will discuss firing and staining with oxides. If you are using air dry clay I will show you how to seal and “antique” stain your hares. After that the choice is yours as to how much or little extra embellishment you would like to add. Below are a few of the hares I have created using both porcelain and air drying clay. You can add your hare to boxes or plinths to create wonderful finished pieces.
Porcelain hares below on examples of boxes and jars (you can choose how to mount, or not, your own hares, creating the boxes and stands is not part of this class).

Air dry clay example hare below with added collage (you can choose how to decorate your own hares, collage is not part of this class).

Come and join me and create your own magical hares!
Who is this class for?
This is a beginners to intermediate class incorporating basic clay sculpture and forming techniques. There are 2 full length detailed projects, along with supplies videos. It is a work at your own pace class. You will gain access to 6 hours of video, the sitting hare is a 3 hour lesson, the reclining hare is a 2 hour lesson.
This class also includes a fully detailed step by step pdf of instruction download for creating the sitting hare, so it is easy to follow along.
This is an open ended workshop with no expiration date. Plus all the videos are downloadable and yours to keep!
You will have access to my private combined FACEBOOK GROUP with others that are also taking my classes, to share your work and get feedback.
I am so thankful I found Toni. Toni is a fantastic artist and teacher. I am currently enrolled in six classes. I love her style, her personality, and, of course, her art. I have learned so much. When watching her videos, I feel like I’m sitting in the room with her. She makes me feel so comfortable. She is precise in her instructions. I know I will always be enrolled in Toni’s classes. Thank you, Toni, for being such a great teacher. – Barbara S.
***Click here to see what students have said about some of my classes.
What supplies will I need for the class?
The supplies and tools below are standard pottery and ceramic tools. I recommend that if you haven’t used clay before or done sculpture that you watch the supplies videos in the class first, as you do not need to purchase all of these, there are many household and kitchen items that will do the same job. If you are using kiln fired clay, stoneware, earthenware or porcelain I will show you how to add paper to it for strength (it fires out in the kiln).
We do NOT use armatures or wire etc. in this class. The hare body is hollow.
- Clay – approximately 700 grams required per hare.
- Two options are suitable for this class – air drying clay OR clay that gets fired in a kiln.
- Air drying clay – I use DAS as it has minimal shrinkage so less prone to cracking
- Kiln fired ceramic clay – I use Keane midfire lumina Porcelain – however any kind of clay will work as long as you have an appropriate kiln firing service to fire you clay (or your own kiln)
- Wooden board/s to work on
- Rotating potter’s banding wheel or lazy susan
- Clay modelling tools – basic set, refer to image below
- Scoring tool or piece of comb for scratching
- Flexible rib – mud tools shape “0” red polymer rib or similar (silicone spatula)
- Wooden dowels or small wood rollers – (you can use chopstix, or wooden spoon handle etc.)
- Bamboo skewers
- Wire cutter – eg. Cheese wire slicer or piece of fishing line
- Sponge
- Brush and water
- Scales for weighing in grams
- Toilet paper
- Cornflour – optional
To finish the hare after it has dried
Air dry clay hare
- Clear matte medium or gel/varnish (I use Liquitex matte medium)
- Acrylic paint in dark brown tone (optional)
Kiln fired Ceramic Hare
- Underglaze or oxide washes (optional)

Accessing your class
This class has immediate access. When you proceed through the checkout you will be asked to login (if you have previously purchased another class) or register (if this is your first class on this site). Following your purchase this class will appear in your My Courses page when you login under My Classroom in the website menu. You can always find your classes here https://www.toniburt.com.au/my-courses/
**Due to the nature of the immediate availability of this course, all online classes are non-refundable.
If you have any questions?
If you have any questions at all please contact me via the contact page. I will do my best to reply to your message within 24 hours. NB: I am located in Australia so there might be a little timezone difference!